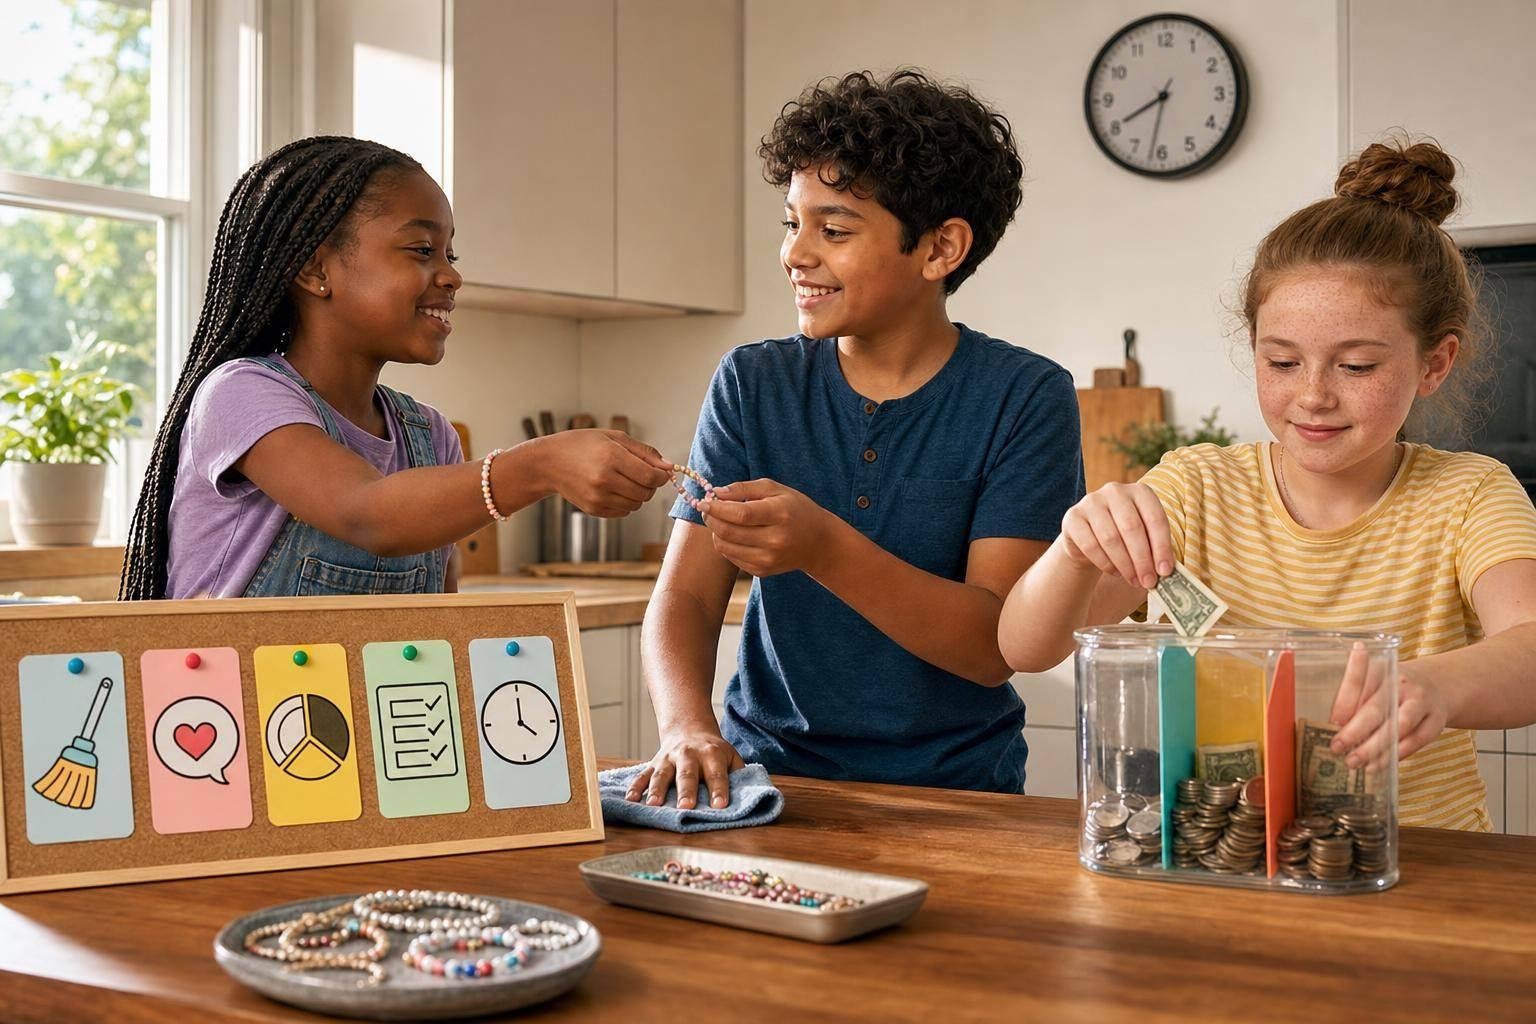

A kid business works better when I plan the money first. This 7-step budget routine shows me how to pick a goal, list supply costs, set a price, bring change, track each sale, count profit, and fix mistakes before the next sales day.
In plain terms, the article says this: if I want to sell something like slime vs lemonade stands, crafts, or yard work, I should not guess. I should use simple math. For example, if I sell 20 items at $3.00 each, I can expect $60.00 in sales. If my costs are $40.00, my profit is $20.00. That gives me a clear target before I start.
Here’s the full routine at a glance:
- Step 1: Pick what to sell, who will buy it, and my money goal
- Step 2: Write down all costs, including one-time costs and per-item costs
- Step 3: Set a price that covers costs and leaves money left over
- Step 4: Bring enough cash and coins to make change for early customers
- Step 5: Track money in, money out, and the cash total during the sale
- Step 6: Figure out profit with income minus expenses
- Step 7: Review what sold, what was wasted, and what to change next time
A few points stand out:
- A budget is just a money plan before selling starts
- Small costs like bags, labels, and tape can cut into profit
- Simple prices like $2.00, $3.00, and $5.00 make selling and giving change easier
- Bringing change for the first 10–15 customers can help the sale run smoothly
- Profit can be split into Save, Spend, and Share, such as 40% / 40% / 20%
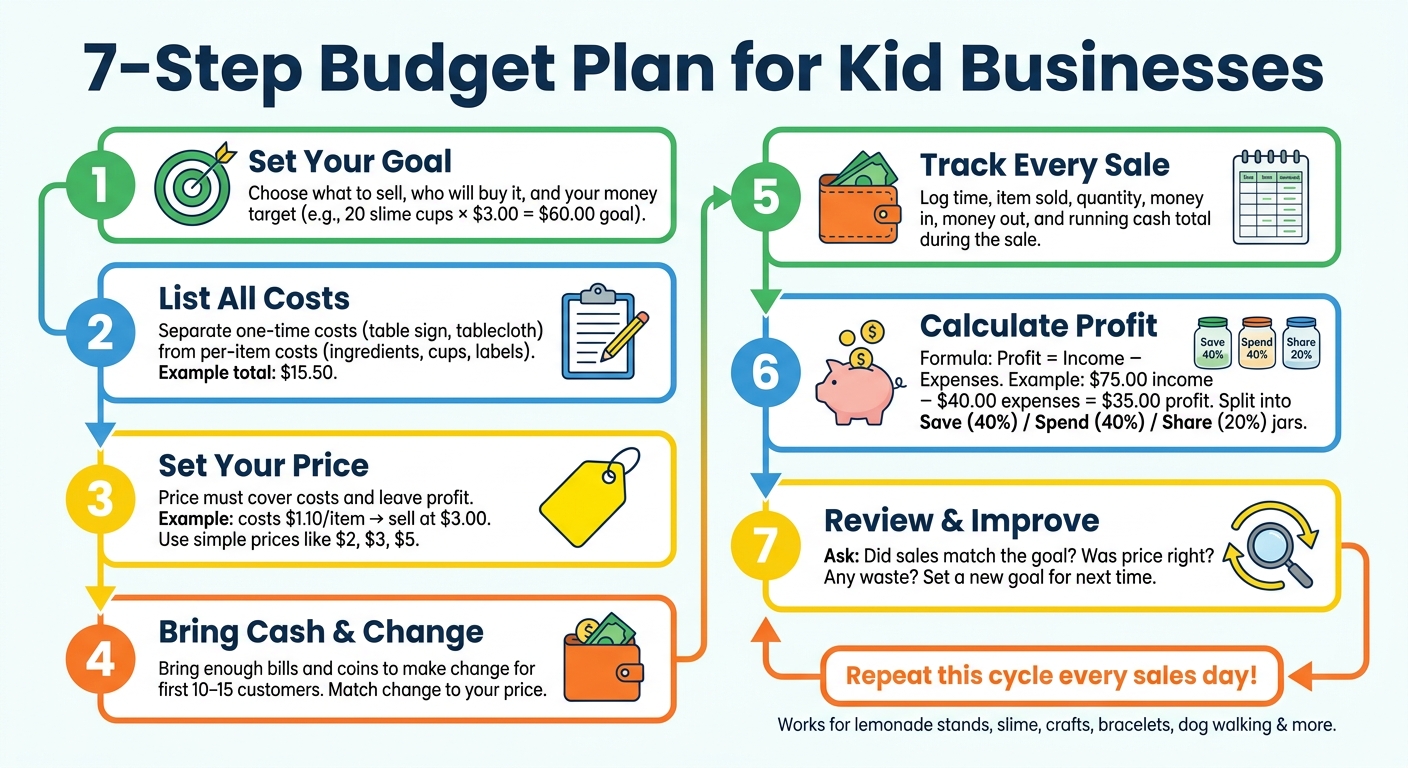
7-Step Budget Plan for Kid Businesses
Financial Literacy for Kids | Saving, Budgeting, Business & Profit Loss | Kids Learning Songs
Quick Comparison
| Part of the plan | What I do | Why it matters |
|---|---|---|
| Goal | Choose product, buyer, and money target | Gives the sale a clear direction |
| Costs | List one-time and per-item costs | Shows how much money goes out |
| Price | Set price per item and sales target | Helps cover costs and earn profit |
| Cash | Bring bills and coins for change | Helps early sales go better |
| Tracking | Log each sale and each expense | Keeps the numbers straight |
| Profit | Subtract expenses from income | Shows what the business made |
| Review | Look at results and adjust | Helps the next sale go better |
The main takeaway: I can use the same budget plan again and again for small kid businesses, and each sale gives me new numbers to work from.
Steps 1-2: Set the Business Goal and List Supply Costs
Step 1: Choose the Product, Customer, and Money Goal
Before buying a single supply, the child should make three choices: what to sell, who will buy it, and how to make money as a kid.
That matters because a vague goal is tough to budget for. A clear goal gives the whole plan direction. For example, selling 20 slime cups at $3.00 each and trying to earn $60.00 is much easier to plan around.
The money goal should connect to something real. If a child wants to save for a $50.00 toy or game, that becomes the target. Then they can work backward and figure out how many items they need to sell and whether the price per item works. That target points the budget in the right direction.
For a slime business, kids make the product, price it by cup or container, and sell to neighbors or at a local event. My Lil Startup offers a Slime Business Kit that fits this model, including 20 pre-made slimes, decorations, instructions, marketing flyers, thank-you cards, and a sales tracker.
Step 2: Write Down One-Time Costs and Per-Item Costs
Once the goal is set, it's time to write down every cost.
This is where many young sellers slip up. A label here, a bag there, or a roll of tape can eat into profit fast. Small costs don't look like much on their own, but together they can make a big dent.
The main idea is to separate one-time costs from per-item costs. A tablecloth or sign is bought once and used again at each sale. Slime ingredients, cups, labels, and bags get used up each time a new item is made.
One-time costs stay the same across sales. Per-item costs go up with every product. That difference helps kids set a price that covers what each item costs to make.
| Budget Item | Example Items | What It Means |
|---|---|---|
| One-time costs | Table sign, tablecloth, cash box | Bought once and reused |
| Per-item costs | Slime ingredients, cups, labels, bags | Bought again each time a new item is made |
Write each cost in dollars and cents, then add them up. For example, $8.50 for glue and activator, $4.25 for cups, and $2.75 for labels adds up to $15.50.
Once the costs are totaled, the price has to cover them.
Steps 3-5: Set Prices, Plan Cash, and Track Every Sale
Step 3: Set the Price Per Item and Sales Goal
Choose a price that covers your cost and still leaves money left over. For example, if each slime cup costs $1.10 to make, pricing it at $3.00 gives you room for profit and helps cover small mistakes or discounts.
Simple prices like $2.00, $3.00, or $5.00 are easy for customers to follow. They also make it easier for kids to multiply totals and give change without getting stuck doing tricky math.
Expected revenue = price per item × number of items sold
So if you sell 20 slime cups at $3.00 each, your expected revenue is $60.00. That gives you a clear target for the day. It also helps you figure out how much change to bring.
Step 4: Decide How Much Cash and Change to Bring
After the price is set, build your cash box around it. Cash on hand means the money you bring for making change. It does not mean money earned from sales.
A good rule is to bring enough small bills and coins to make change for the first 10–15 customers.
Try to match your change to your price. If each item costs $3.00, bring plenty of $1 bills since many people may hand over a $5 bill. That way, the first few sales go smoothly instead of turning into a scramble.
Step 5: Track Money Before, During, and After the Sale
Track every dollar that comes in, every dollar that goes out, and what stays in the box. Start before the first sale by writing down the opening cash total at the top of your tracker.
During the sale, log each transaction right away. Write down:
- the time
- what was sold
- how many
- the money received
- any change given back
- the updated running total
If you buy extra supplies in the middle of the sale, record that as money out. Then lower the running total to match.
| Time | Item Sold | Qty | Money In ($) | Money Out ($) | Running Cash Total ($) |
|---|---|---|---|---|---|
| Start | - | - | 0.00 | 0.00 | 30.00 (starting cash) |
| 10:05 | Slime Cup | 1 | 5.00 | 2.00 (change) | 33.00 |
| 10:20 | Slime Cup | 2 | 6.00 | 0.00 | 39.00 |
| 10:45 | Extra supplies | - | 0.00 | 3.00 | 36.00 |
| 11:10 | Slime Cup | 1 | 3.00 | 0.00 | 39.00 |
At the end of the day, count the cash in the box and compare it with the final running total. If the numbers match, your tracking did its job. If they don’t, that still teaches you something useful.
The My Lil Startup Slime Business Kit includes pre-designed sales tracker sheets for easy logging during the sale.
Use the final total to calculate profit in Step 6.
Steps 6-7: Calculate Profit and Improve the Next Sales Day
Step 6: Calculate Profit and Split the Money
Now it’s time to see what the business actually made. Use the numbers from your tracker and your final cash count to figure out profit. The formula is simple: profit = total income − total expenses.
Income is the money that came in. Expenses are the money that went out. So if a slime stand made $75.00 from selling 25 cups at $3.00 each, and total expenses were $40.00, the profit comes to $35.00. Write each number down, then subtract.
Once you’ve got the profit, split it with the three-jar method. Label three envelopes or jars "Save", "Spend", and "Share," then put the cash into each one. For a $35.00 profit, the split could look like this:
| Jar | Percentage | Dollar Amount |
|---|---|---|
| Save | 40% | $14.00 |
| Spend | 40% | $14.00 |
| Share | 20% | $7.00 |
Each jar should have a clear job. The Save jar might go toward restocking supplies or moving up to a larger kit. The Spend jar is for a personal treat. The Share jar can go to a cause the kid cares about. That way, the money doesn’t just sit there. It has a purpose.
Step 7: Review What to Keep and What to Change
After splitting the profit, take 10–15 minutes to look back at the sale and make the next one better. Keep the review short and focused. Work through these four questions:
- Did sales match the goal?
- Was the price right?
- Were any supplies wasted?
- How many items were left?
Use those answers to adjust the budget before the next sales day. If cups sold out early, make more next time or charge a bit more. If supply costs were too high, buy in bulk or reuse items like signs and tablecloths to bring down the cost per item.
Finish by writing down one new budget goal for the next sale. Make it specific, like "Next Saturday, sell 30 cups and earn $45.00 in profit." Putting that goal on paper ties this sales day to the next budget plan.
Conclusion: The 7-Step Budget Plan in One Simple Routine
After Step 7, the cycle starts again for the next sale. Each time, kids can follow the same seven-step routine: set the goal, total the costs, set a price, bring change, track sales, calculate profit, and review the results. When they use that routine every time, they learn to plan with purpose.
And it teaches a lot more than math.
Listing supply costs helps kids see what things cost and where trade-offs come in. Setting a price and a sales goal pushes them to think things through. Bringing enough small bills and coins teaches responsibility and being prepared. Tracking every sale builds honesty and close attention to detail. Then, splitting profit into save, spend, and share gives kids a simple way to practice healthy money habits.
The nice thing is that this same plan fits many small kid businesses. It works for lemonade stands, bracelets, slime cups, and simple services like dog walking. The product may change, but the 7 steps stay the same.
A kid business starts to feel real when costs are covered and profit is clear. That habit can give a child more confidence going into the next sale.
If your child wants a ready-made starting point, My Lil Startup's Slime Business Kit includes a sales tracker and starter materials. What matters most is the habit: plan, track, count, improve.
FAQs
How do I know if my price is too low?
Your price is too low if you’re not making a profit after covering all your costs, including materials and extra decorations.
A simple way to check: subtract your total costs from your total sales. If your profit keeps getting smaller, or you’re only breaking even, it’s probably time to charge more.
One common rule of thumb is to multiply your cost per item by three or four.
What if I sell fewer items than planned?
If you sell fewer items than you planned, look at your sales tracker to figure out what’s slowing things down. That’s a normal part of running a business, and it gives you a chance to learn what’s working and what isn’t.
Then review your expenses to make sure your pricing still covers your costs and leaves room for profit. You can also tweak your marketing strategy and keep tracking your records so your next decisions are based on what the numbers are telling you.
How much starting cash should I bring?
Bring at least $20.00 in small bills for cash on hand. That gives you enough to make change when customers pay with larger bills. Keep the money in a secure cash box or envelope.
Your starting cash should also help cover your first supply costs, such as a My Lil Startup kit, so you have what you need for an organized launch and clear sales tracking.